
Microscopes, essential tools in science, reveal hidden worlds!
Understanding microscope parts and their functions, often detailed in a PDF manual,
is crucial for effective observation and analysis. These instruments,
from basic models to advanced types, magnify small objects, aiding discoveries.
What is a Microscope?
A microscope is an instrument used to view objects that are too small to be seen by the naked eye. Achieving this magnification relies on a carefully arranged system of parts, each with a specific function. Detailed explanations of these parts, including diagrams, are commonly found in microscope user manuals, often available as PDF downloads.

Essentially, a microscope uses lenses to bend light, creating an enlarged image of the specimen. Understanding the interplay between the optical parts – like the objective and eyepiece lenses – and the mechanical parts – such as the stage and adjustment knobs – is key to proper operation. These manuals often include labeled diagrams to aid in identification and understanding. The ability to correctly identify and utilize each component is fundamental to successful microscopic observation and analysis, as outlined in resources like “Parts-of-a-Microscope-with-Functions-and-Labeled-Diagram”.
Types of Microscopes (Focus on Compound)
While various microscope types exist – including electron and stereo microscopes – the compound microscope remains a staple in educational and research settings. These instruments utilize multiple lenses to achieve higher magnification than simpler microscopes. A comprehensive understanding of its parts and functions is often detailed in accompanying PDF manuals.
The compound microscope’s functionality hinges on the coordinated operation of optical and mechanical parts. Resources like “Parts of a microscope with functions and labeled diagram” illustrate this complexity. These manuals typically provide labeled diagrams, aiding in the identification of components like the objective lenses, condenser, and stage. Successfully utilizing a compound microscope requires familiarity with these parts and their roles in image formation, as explained within the PDF documentation.
Basic Microscope Parts – An Overview
Microscopes consist of optical and mechanical parts working together. PDF resources, like user manuals, detail each component’s function for optimal use!
Mechanical Parts
Microscope’s mechanical parts provide support and control. The base offers stable footing, while the arm connects to the head and facilitates carrying. Crucially, the stage holds the specimen, secured by stage clips. Precise focusing relies on the coarse and fine adjustment knobs; the coarse knob provides large-scale adjustments, and the fine knob enables precise, detailed focusing.
Understanding these components, often illustrated in microscope parts diagrams found in PDF format, is essential. A manual will explain how these parts interact. Proper handling ensures longevity and accurate observations. These mechanical parts are fundamental to the microscope’s operation, enabling scientists and students to explore the microscopic world effectively. Referencing a PDF guide aids in proper identification and usage.
Optical Parts
Microscope’s optical parts are responsible for magnification and image clarity. The eyepiece (or ocular lens) magnifies the image formed by the objective lens. Objective lenses, varying in magnification power, gather light from the specimen. Below the stage, the condenser focuses light onto the sample, while the iris diaphragm controls the amount of light.
The light source, powered by a power switch, illuminates the specimen. Detailed PDF manuals often include diagrams labeling these parts. Understanding their functions, as outlined in microscope parts guides, is vital for optimal viewing. Proper alignment and adjustment of these optical parts ensure a clear, high-resolution image. These components work in harmony to reveal the intricate details of the microscopic world.

Detailed Examination of Mechanical Parts
Microscope’s mechanical parts – base, arm, stage, and adjustment knobs – provide support and control.
PDF manuals detail their functions for proper operation and maintenance.
Base
The microscope base is the foundational support structure, providing stability during observation. Typically, it’s a horseshoe-shaped component, offering a low center of gravity to prevent tipping. PDF manuals consistently emphasize the importance of placing the microscope on a flat, stable surface, resting securely on the base.
This part often houses the illumination system, including the light source and power switch. Some bases incorporate rubber feet to further enhance stability and protect the work surface. Understanding the base’s role is fundamental, as it directly impacts image clarity and user safety. Proper handling, as outlined in user guides, ensures the longevity of the entire instrument. A damaged base compromises the entire microscope’s functionality.
Arm
The microscope arm serves as the primary support for the microscope’s optical components. It’s the vertical pillar connecting the base to the head, housing the objective lenses. PDF manuals consistently instruct users to grasp the arm when carrying the microscope, ensuring a secure and balanced hold.
This prevents strain on other delicate parts. The arm facilitates adjustments for focusing and rotating the microscope head. It’s typically constructed from a sturdy metal alloy for durability. Proper care, detailed in user guides, involves avoiding forceful bending or twisting of the arm. Damage to the arm can misalign the optical system, impacting image quality and potentially rendering the microscope unusable.
Stage and Stage Clips
The microscope stage is the flat platform where specimens are placed for observation. PDF manuals emphasize its importance in securing slides for stable viewing. Often, the stage features mechanical knobs enabling precise movement of the slide in both horizontal (X) and vertical (Y) directions, allowing for systematic scanning of the sample.
Stage clips, metal or plastic fasteners, hold the slide firmly in place. However, some microscopes utilize a mechanical stage, eliminating the need for clips. User guides caution against excessive force when using stage clips to prevent slide breakage. Proper alignment of the specimen on the stage is crucial for optimal image clarity, as detailed in many instructional PDF resources.
Coarse and Fine Adjustment Knobs
Microscope focusing relies on two key knobs: coarse and fine adjustment. PDF manuals consistently highlight their roles in achieving clear images. The coarse adjustment knob facilitates large-scale focusing movements, quickly bringing the specimen into approximate focus. However, manuals warn against overuse, especially with high-power objective lenses, to avoid damaging the slide or objective.
Once a preliminary focus is achieved with the coarse knob, the fine adjustment knob allows for precise, minute adjustments. This knob sharpens the image, revealing intricate details. PDF guides often illustrate the proper sequence: coarse focus first, followed by fine tuning. Mastering these knobs, as explained in user manuals, is fundamental to successful microscopy.

In-Depth Look at Optical Parts
Optical parts, detailed in PDF guides, shape and magnify light. Manuals explain lenses, condensers, and light sources work together to create clear, detailed microscope images.
Eyepiece (Ocular Lens)
The eyepiece, or ocular lens, is the lens you look through at the top of the microscope. Its primary function is to magnify the image created by the objective lens. PDF manuals often detail varying magnification powers, commonly 10x, but others exist.
Understanding the eyepiece is vital; it doesn’t increase magnification independently but magnifies the already magnified image. Some microscopes feature binocular eyepieces for comfortable viewing with both eyes. Proper adjustment of the eyepiece, as described in user guides, ensures a clear and focused image.
Diopter adjustments on one eyepiece compensate for differences in vision between your eyes. Refer to your microscope’s parts diagram and manual for specific instructions on adjusting and utilizing the eyepiece effectively for optimal viewing and image clarity.
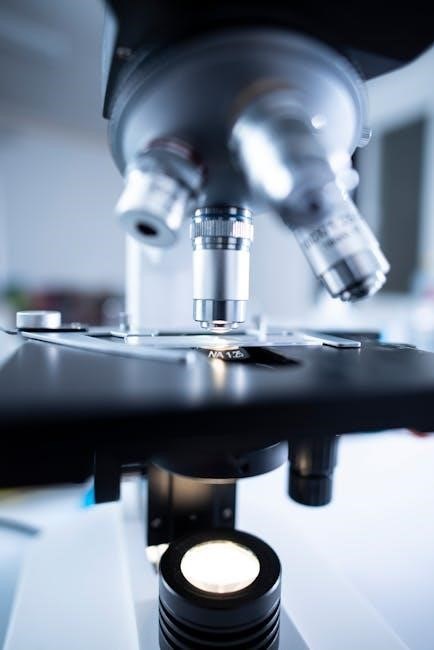
Objective Lenses
Objective lenses are the primary lenses responsible for magnifying the specimen. Typically, a compound microscope has multiple objective lenses – 4x, 10x, 40x, and 100x are common. PDF manuals will specify the magnification power of each lens. These lenses are mounted on a revolving nosepiece, allowing for easy switching between magnifications.

Higher magnification objective lenses require increased illumination and often necessitate the use of immersion oil to enhance resolution. The manual will detail proper oil immersion techniques. Understanding the numerical aperture (NA) of each objective is crucial, as it impacts resolution.
Careful handling of objective lenses is essential to prevent damage. Always refer to the microscope’s parts diagram and user manual for cleaning and maintenance instructions to ensure optimal performance and longevity of these critical components.
Condenser and Iris Diaphragm
The condenser focuses the light from the microscope’s light source onto the specimen, enhancing illumination and resolution; A PDF manual will explain how to adjust the condenser’s height for optimal light concentration. Proper condenser alignment is vital for clear imaging.
Beneath the condenser lies the iris diaphragm, a crucial component for controlling the amount of light reaching the specimen. Adjusting the iris diaphragm impacts contrast and depth of field.
Microscope parts diagrams in the manual illustrate the relationship between these components. Closing the iris diaphragm increases contrast, useful for transparent specimens, while opening it provides brighter illumination. Mastering these adjustments, as detailed in the manual, is key to achieving high-quality microscopic images.
Light Source and Power Switch
The light source, often a halogen or LED, provides the illumination necessary to view the specimen. A microscope parts PDF manual will detail the specific type of bulb and its wattage. Consistent brightness is essential for reliable observations.
The power switch controls the flow of electricity to the light source. Always ensure the switch is in the “off” position before plugging in or unplugging the microscope. Refer to your manual for specific safety instructions regarding the power switch.
Modern microscopes often feature adjustable light intensity. The manual will explain how to regulate brightness for optimal viewing. Proper use of the light source and power switch, as outlined in the manual, ensures both image quality and instrument longevity.
Microscope Diagrams and Labeling
Labeled diagrams, often found in microscope parts PDF resources, are vital for identification.
They visually represent components, aiding understanding of functions and proper usage.
Labeled Diagram of a Compound Microscope

A comprehensive labeled diagram of a compound microscope is an invaluable resource, frequently available as a PDF within user manuals or educational materials. These diagrams meticulously illustrate each component, connecting structure to function. Key elements typically include the base, providing stable support; the arm, facilitating carrying; and the stage, where specimens are placed, secured by stage clips.
The objective lenses, offering varying magnification powers, are prominently featured, alongside the eyepiece (ocular lens) for viewing. Coarse and fine adjustment knobs are clearly indicated, demonstrating their roles in focusing the image. Essential optical components like the condenser and iris diaphragm, controlling light intensity and contrast, are also labeled. Finally, the light source and power switch complete the illustration, showcasing the instrument’s operational aspects. Understanding these labeled parts is fundamental to effective microscopy.
Using Microscope Diagrams for Identification
Microscope diagrams, often found within PDF format manuals, are powerful tools for component identification. Begin by comparing the physical microscope to the diagram, systematically matching each part. Focus on key features – the base’s shape, the arm’s curvature, and the stage’s positioning.
Next, correlate each labeled element with its function. For example, locate the coarse and fine adjustment knobs and understand their roles in focusing. Identify the objective lenses and recognize how magnification changes with each. Utilize the diagram to trace the path of light, from the light source, through the condenser and iris diaphragm, to the eyepiece.
Regular practice with these diagrams, alongside hands-on experience, solidifies understanding and facilitates efficient microscope operation and maintenance.
Microscope Manuals and PDF Resources
Microscope manuals, often available as PDFs, detail parts, functions, and maintenance. These resources offer comprehensive guides for optimal instrument usage and troubleshooting.
Finding and Utilizing Microscope User Manuals
Locating a microscope user manual is often the first step towards understanding its operation. Many manufacturers provide PDF versions of their manuals directly on their websites, accessible through a support or downloads section. A targeted online search using the microscope model number and “user manual” or “PDF” will frequently yield results.
Once obtained, carefully review the manual to familiarize yourself with the specific parts of your microscope and their corresponding functions. Pay close attention to diagrams and labeled illustrations, as these visually demonstrate component locations and usage. The manual will also outline proper operating procedures, maintenance schedules, and safety precautions. Utilizing these resources ensures optimal performance and extends the lifespan of your valuable scientific instrument. Remember to avoid direct links to PDF downloads, instead guiding users to search for them.
Accessing Microscope Parts Diagrams in PDF Format
Microscope parts diagrams in PDF format are invaluable resources for identification and understanding. Numerous online repositories and educational websites offer downloadable diagrams, often included within comprehensive manuals or standalone guides. Searching for “[microscope type] parts diagram PDF” will yield relevant results. These diagrams typically feature labeled illustrations of each component, clarifying its name and function.
These PDFs are particularly useful for students learning microscope anatomy or technicians performing repairs. They allow for detailed examination of each part, aiding in troubleshooting and maintenance. When utilizing these resources, ensure the diagram corresponds to your specific microscope model for accuracy. Remember to avoid directly linking to PDF files; instead, provide search terms and guidance on locating them independently.